Streamline Your Translation Process with Taia:
A Guide to Preparing and Exporting Your InDesign Project for Translation
Navigating the path of multilingual content creation can be daunting, especially when it comes to preparing an Adobe InDesign project for translation. But what if we told you that you don’t need to recreate your entire project in another language from scratch? Instead, you can translate the whole file, preserving all your hard work on the layout and design, and only adjust the text to the new language. Sounds intriguing, doesn’t it?
In our latest guide, we demystify this process, providing step-by-step instructions on how to optimize your InDesign projects for translation with Taia. From image placement and compression to text arrangement and font selection, and even managing the translation process on the Taia platform, we’ve got you covered.
With our efficient and user-friendly process, you can significantly reduce the time and cost associated with preparing files for translation and rebuilding them after translation. This comprehensive guide aims to make your workflow smoother and help you expand your reach to audiences worldwide. Let’s dive into the details and revolutionize your approach to multilingual InDesign projects.
Let’s have a look at the following steps to ensure a smooth translation process of your InDesign project:
- Placing and Compressing Images
- Organizing Images
- Arranging Text and Font Selection
- Exporting to IDML
Translating Your InDesign Project with Taia- Step 1: Sign In or Sign Up
- Step 2: Create a New Project
- Step 3: Review and Submit Your Project
- Step 4: Monitor Your Project
- Step 5: Download the Translated File
- Importing the Translated IDML
- Conclusion
Placing and Compressing Images
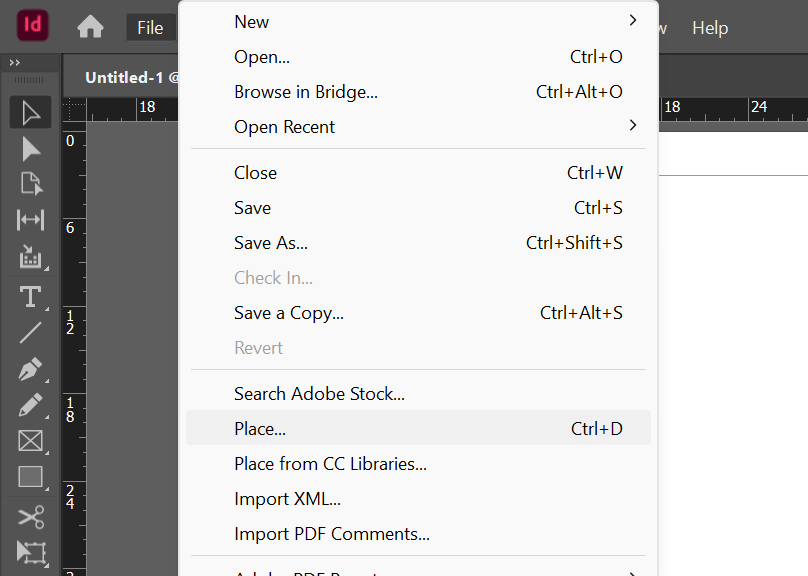
When adding images to your InDesign project, always use the `Place` function instead of copying and pasting. This method ensures the images are correctly referenced and can be managed separately from the InDesign file. Here’s how:
- Select `File > Place` or use the shortcut `Ctrl/Cmd + D`.
- Navigate to your image file and select `Open`.
- Click or click-drag in your document to place the image where you want it to appear.
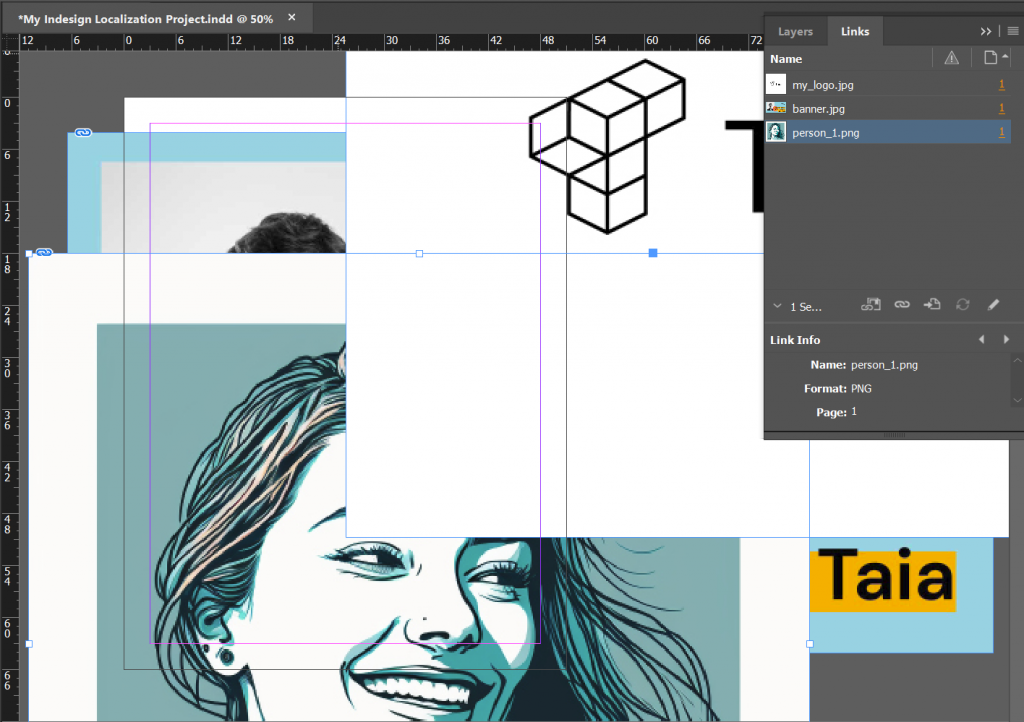
Placed images will show up as Links in your project.
Once the file is translated, your images will remain in the same spot and can be relinked from your folder:
To reduce the overall size of your InDesign file, compress your images before adding them to the project.
Tools like Adobe Photoshop or online image compressors can optimize your images without sacrificing quality.
An image of 300 DPI is usually perfectly adequate, even for high quality printing.
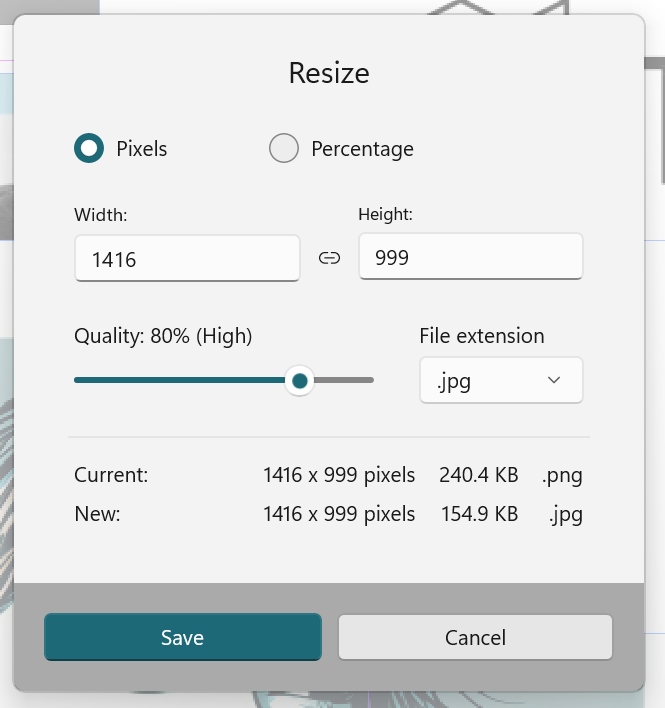
Windows 11 also has this feature integrated into the Photos app.
Just open your image, click on the °°° menu and select `Resize image`.
Insert the correct Width and Height, and select your desired quality.
Don’t forget that a JPEG image can reduce the size more than a PNG due to compression.
Organizing Images
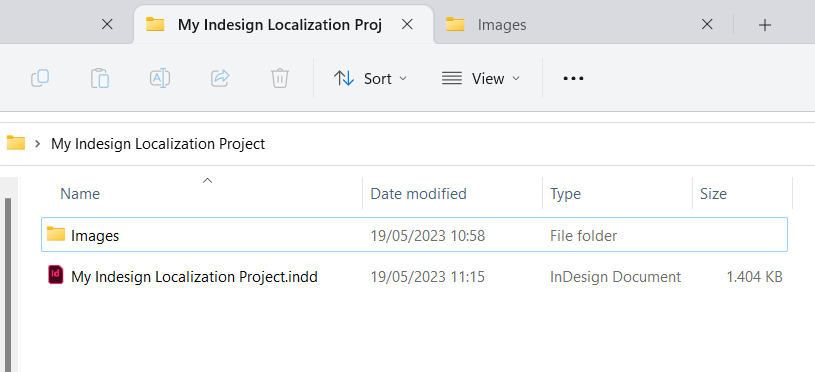
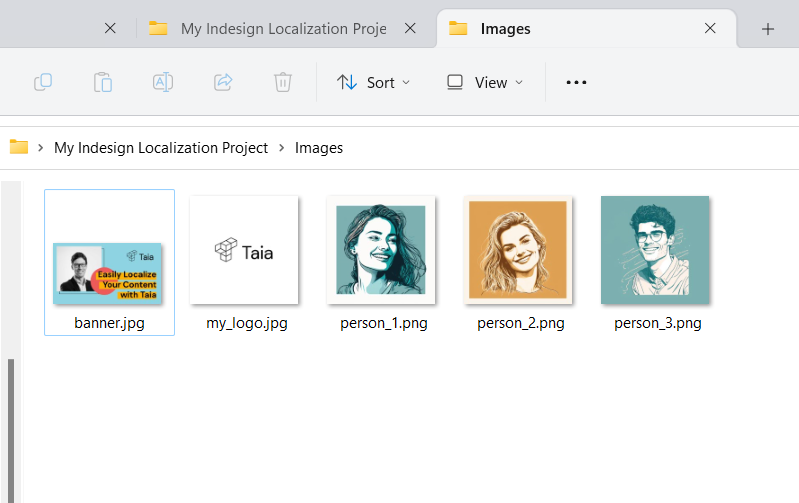
It’s best to store all images used in your project in a separate folder. This practice ensures all your links remain intact when moving your project, and provides the translation team with easy access to the visual context.
Arranging Text and Font Selection
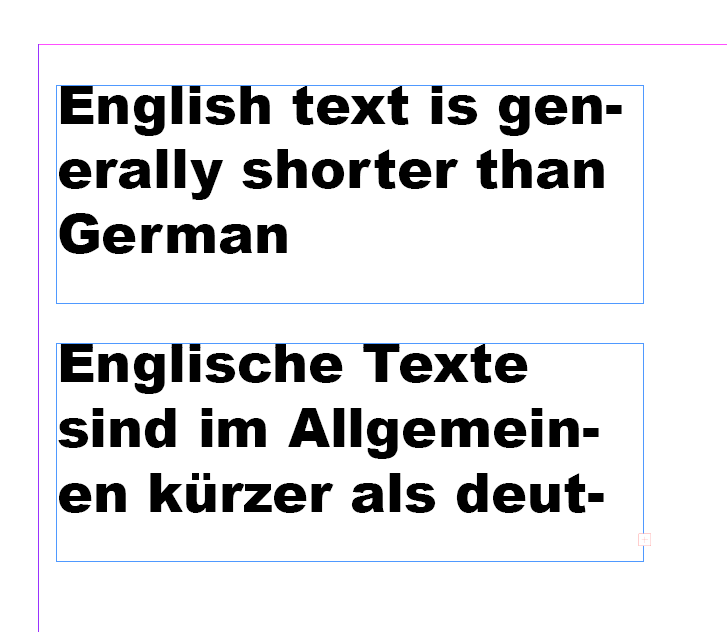
Strategically arrange your text in a clear and logical manner to facilitate the Desktop Publishing (DTP) process after translation. Remember that the text flow can change when translated into different languages, so allow ample space for text expansion.
When choosing fonts, select Unicode fonts that support a broad range of characters and languages.
Examples of such fonts include Arial Unicode, Adobe Source Sans Pro, and Google’s Noto fonts.
Don’t forget that text in some languages, like German for example, can take as much as 30% more space than the same text in English!
Exporting to IDML
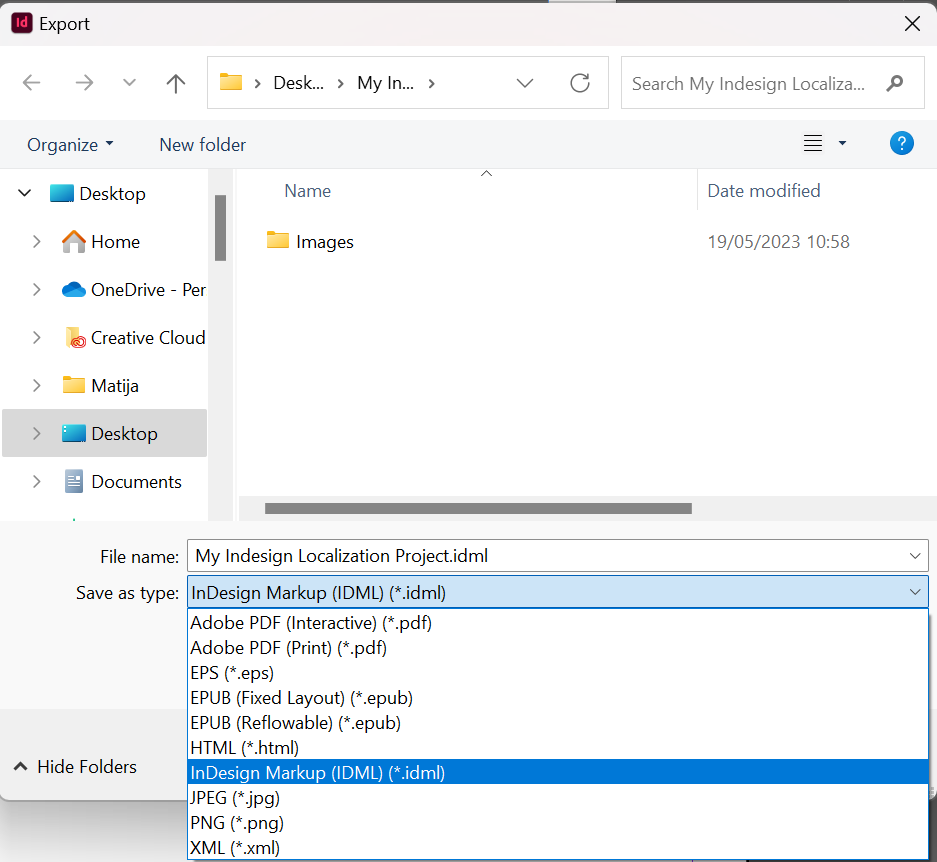
To ensure compatibility with various translation tools, including Taia, it’s recommended to export your InDesign file in an IDML format. Here’s how:
- Go to `File > Export`.
- In the `Format` drop-down menu,
select `InDesign Markup (IDML)`. - Choose a location to save your file and click `Save`.
This is the IDML file we will now use to translate your project.
Translating Your InDesign Project with Taia
Now that your InDesign project is prepared for translation, let’s move on to how you can translate the file using the Taia platform. Here’s a step-by-step guide:
Step 1: Sign In or Sign Up
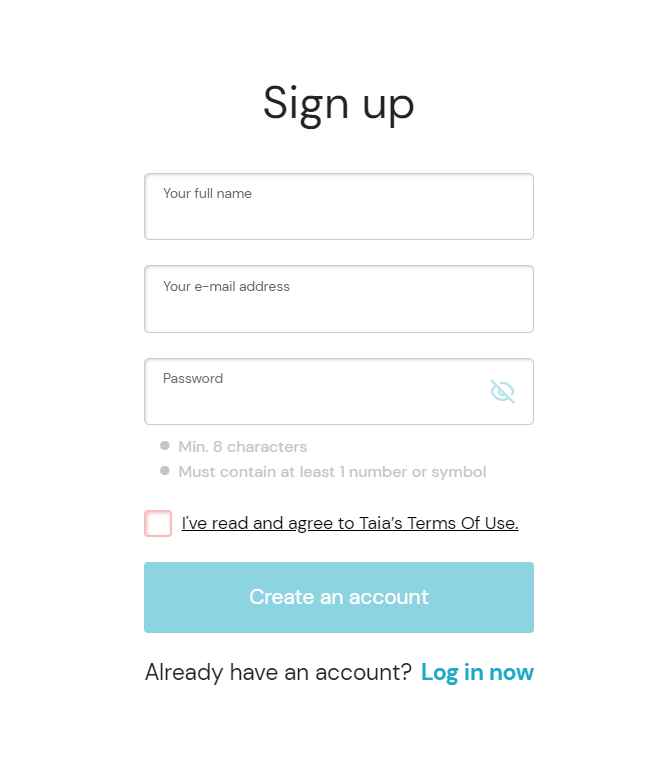
Visit app.taia.io to sign in to your account. If you don’t have an account yet, sign up and follow the on-screen instructions to create one.
It’s free to sign up for a Taia account and you don’t require a credit card!
Step 2: Create a New Project
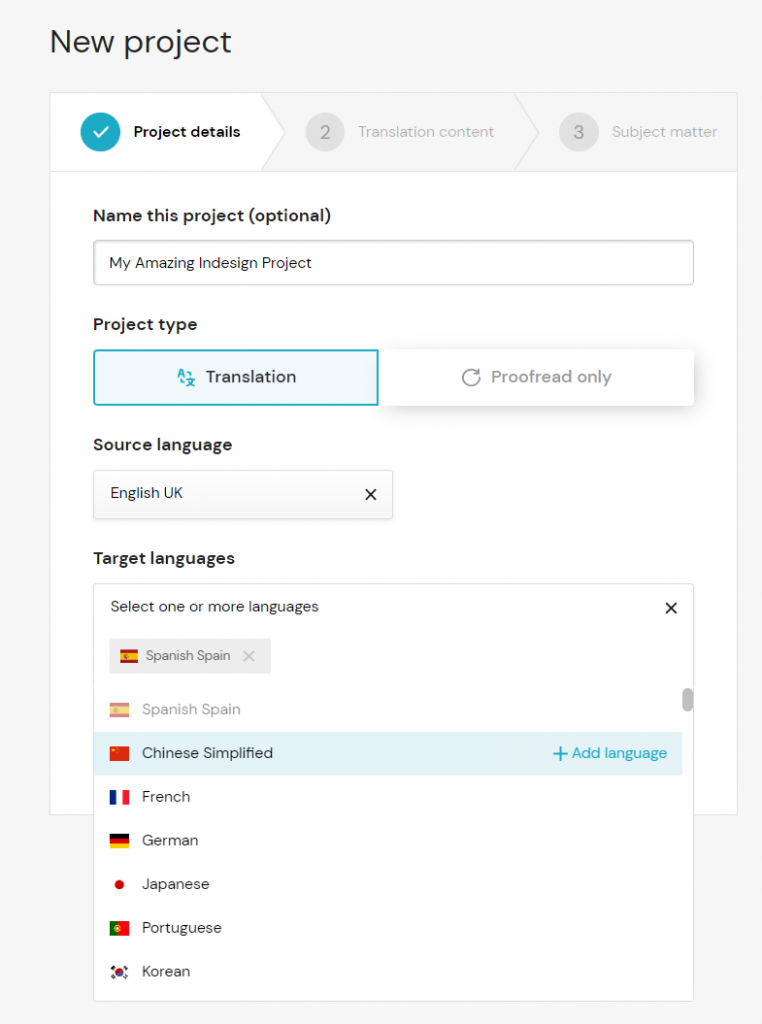
Click on `New Project` and follow these steps:
- Select the Source and Target Languages:
You can choose between 97 different languages and local variations.
If your project needs to be translated into multiple languages,
you can select all the necessary target languages. - Upload Your IDML File(s):
Either drag and drop your IDML file(s) into the designated area or
click the upload button to navigate to your file(s). - Select the Subject Matter/Content Category:
This helps us choose the most suitable translators for your project and
use the correct translation memory with any existing translations already stored with Taia.
Step 3: Review and Submit Your Project
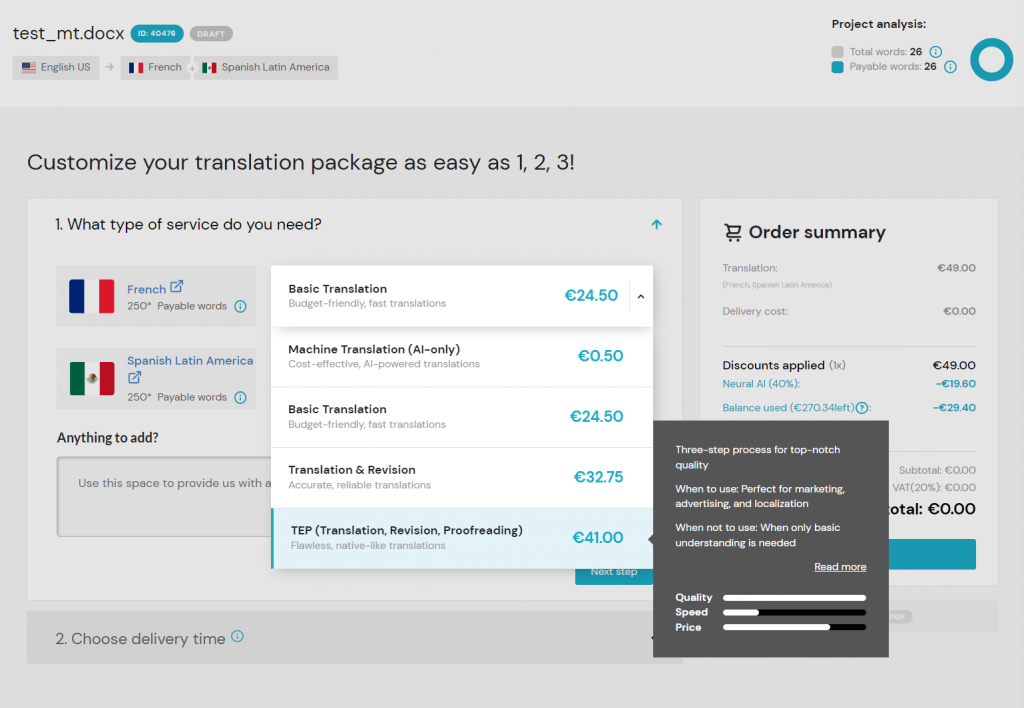
Taia will automatically analyze the IDML file and provide an exact price estimate and the available delivery times.
Choose the services you require, such as basic translation, translation with revision, or translation with revision and proofreading.
Don’t forget to include more information about your project in the “Project Brief” field.
Here, you can also place a link to your full InDesign project with images and other resources for reference (use Google Drive, WeTransfer, or similar services to share the whole project folder).
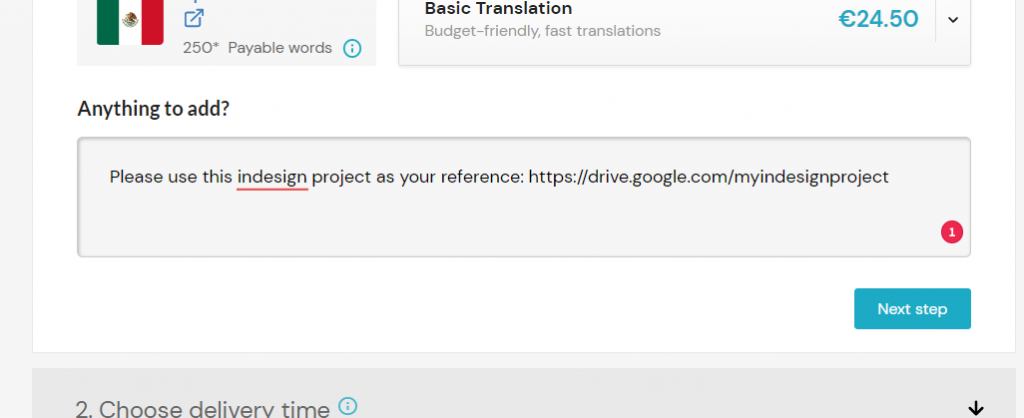
Review the project details again and submit the project directly from the Taia app.
Step 4: Monitor Your Project
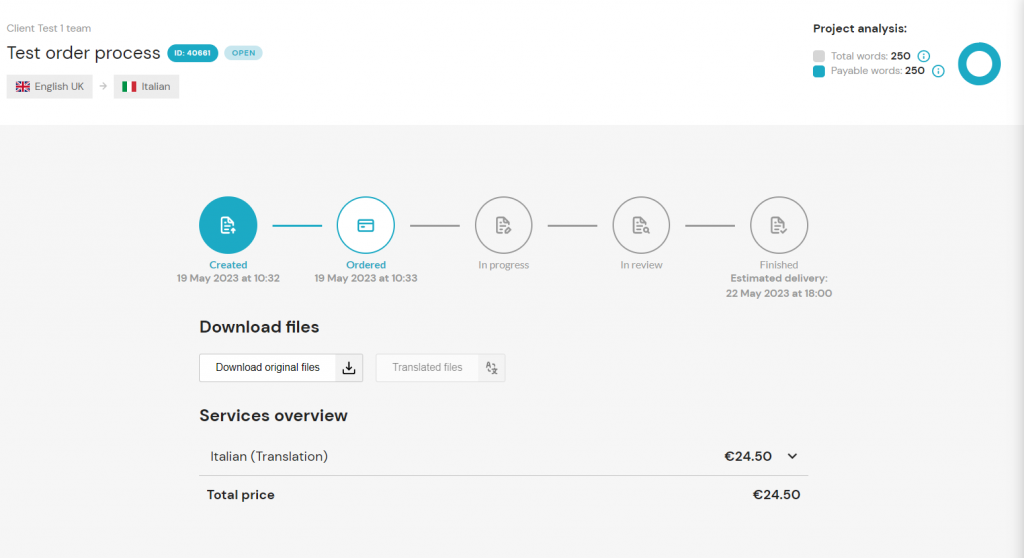
Once the project is ordered, you can monitor its progress directly in the app. A project manager will be assigned to your project and will get in touch to arrange any further details.
Step 5: Download the Translated File
Once the project is translated on our end, you’ll receive a notification. You can then download the translated IDML file directly from the Taia platform.
By following these steps, you’ll be able to easily translate your InDesign project with Taia, ensuring a smooth, efficient process from start to finish.
Importing the Translated IDML
Once you have downloaded your translated IDML file, you can now put it to use. To ensure the file correctly links to the original images and resources, place the downloaded IDML file in the same folder as the original InDesign project.Just rename the file so as not to overwrite the original file. We recommend using language codes such as “en” for English or “de” for German.
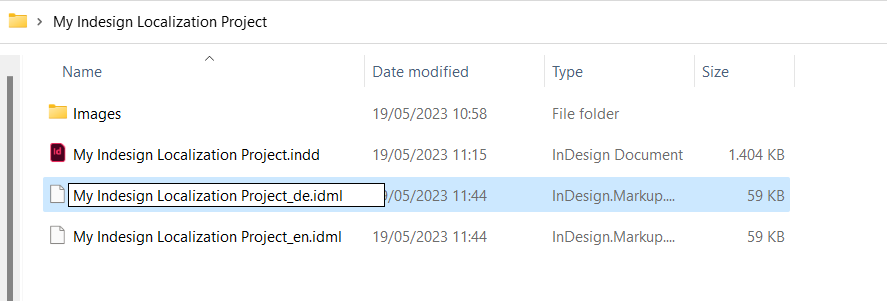
Remember, if you’ve moved any of the original resources or images, you’ll need to update the links in InDesign.
To integrate this back into your project:
- Open InDesign and select `File > Open`.
- Navigate to the translated IDML file and click `Open`.
- Review the translated content in the context of your original design.
Conclusion
By following the above guidelines, you’re well on your way to preparing and exporting your InDesign project for efficient translation with Taia. Remember, the goal is to create a smooth, cost-effective translation process without compromising the integrity of your original design and message.
If you encounter any difficulties or if you have any questions about preparing your InDesign project for translation, please don’t hesitate to reach out to us. Our team is always ready to assist you. Contact us at [email protected] or get in touch with your dedicated Project Manager.
In conclusion, preparing your InDesign project for translation doesn’t have to be a challenge. With Taia and the right approach, you can translate InDesign projects or translate IDML files with ease, saving precious time and resources.
Whether you’re looking to translate a book, booklet, brochure, or any other document, our platform makes it straightforward. Taia helps you preserve the original layout, design, and visual elements while ensuring accurate and contextually appropriate translations. The beauty of this process is that once your file is translated, you won’t have to recreate the document. Instead, you’ll merely adjust the text to the new language.
This means you can focus more on creating great content and less on the technicalities of translating it. You’ll avoid the common frustrations of misplaced images, misaligned text, or incompatible fonts that often come with manual translation methods.
So the next time you need to translate InDesign or translate an IDML file, remember that Taia has got you covered. We streamline the process, ensuring that your translated document looks as good as the original. This is especially vital for book translation, booklet translation, and other design-intensive projects where layout and design play a significant role in the reader’s experience.
In the end, our mission at Taia is to make the translation process more efficient, accurate, and seamless for you. We’re here to support you in creating high-quality multilingual content and reaching a broader audience. Remember, the world is waiting to hear your story, and we’re here to help you tell it.
Take the first step towards reaching your global audience today. Transform your business with Taia.
