Maximizing the potential of Taia’s translation platform is about more than just creating a new project—it’s about leveraging the full range of features to achieve faster translations, lower costs, and higher quality. Whether you’re translating marketing content, product documentation, or software strings, following best practices ensures seamless workflows and exceptional results.
In this comprehensive guide, we’ll walk you through five critical steps to unlock Taia’s full potential:
- Prepare Your Files - Choose the right formats for flawless translations
- Build a Glossary - Ensure consistent terminology across all projects
- Import Translation Memory - Recycle past translations and save 30-60%
- Define Requirements for Translators - Provide clear context for quality
- Master the Dashboard - Your project management control center
By the end, you’ll be a Taia power user, optimizing every translation for speed, cost, and quality.
1. Prepare Your Files: Choose Editable Formats
Why File Format Matters
At Taia, we support 65+ file formats—from familiar Word, Excel, and PowerPoint documents to complex layouts for website and software localization. However, there’s a golden rule for ensuring your translation journey is as smooth as possible:
Always use editable source files (not PDFs or images).
The PDF Problem
While PDFs might seem convenient, they present extensive challenges for translation:
- Text extraction issues - PDF text isn’t always structured (may be images, scanned, or poorly formatted)
- Formatting breaks - Editing PDFs often destroys layout, spacing, and fonts
- Translation Memory limitations - PDF segmentation is unreliable (sentences may not align correctly)
- Cost inefficiency - Manual cleanup required, increasing time and cost
Here’s the truth: Your file probably didn’t start life as a PDF. It likely originated in Word, InDesign, PowerPoint, or another editable program and was converted to PDF for sharing or printing.
The Solution: Go Back to the Source
Always upload the original editable file:
- Word document (.docx) instead of PDF
- InDesign file (.idml) instead of flattened PDF
- Excel spreadsheet (.xlsx) instead of PDF tables
- PowerPoint (.pptx) instead of PDF slides
- HTML/XML instead of PDF web pages
Why this matters: Editable files ensure a hassle-free editing experience and, consequently, flawless translations with preserved formatting.
Supported File Formats
Taia handles 65+ file types, including:
Documents: Word (.docx, .doc), Excel (.xlsx, .xls), PowerPoint (.pptx, .ppt), PDF (text-based), RTF, OpenOffice (.odt, .ods, .odp)
Design & Publishing: Adobe InDesign (.idml), FrameMaker (.mif), QuarkXPress (.xtg)
Web & Software: HTML, XML, JSON, .properties (Java), .resx (.NET), .po/.pot (Gettext), .strings (iOS), .yml/.yaml (Ruby)
Subtitles: SRT, VTT, SUB, SBV
CAT Tools: TMX (Translation Memory), XLIFF, SDLXLIFF, MQXLIFF
Learn more about supported file formats
File Preparation Best Practices
Rule #1: One language per file
- Include only the text you need translated (remove unnecessary content)
- Don’t mix languages in the same document (separate source and target)
Rule #2: Hide unwanted content in Excel
- Hide tabs, columns, or rows you want excluded from translation
- Taia respects hidden content (won’t translate or charge for it)
Rule #3: Clean up before upload
- Remove comments, tracked changes, hidden text (increases word count unnecessarily)
- Validate formatting (ensure consistent styles, no broken tags)
Rule #4: Test with small sample first
- Upload 1-2 pages as test project (verify formatting preservation)
- Review translated output before committing to large volume
By choosing the right file format and following preparation tips, you’re laying the foundation for seamless translation.
2. Build a Glossary: Ensure Consistent Terminology
Why Glossaries Matter
Consistency is key when it comes to translation. A glossary ensures that specific terms and phrases are translated the same way every time, across all projects, languages, and translators.
Without a glossary:
- Product names translated differently (inconsistent branding)
- Technical terms vary between documents (confusing for users)
- Competitors’ names mistranslated (embarrassing errors)
- Brand voice inconsistent across markets
With a glossary:
- ✅ Perfect consistency - “Cloud Storage” always translated identically
- ✅ Faster translation - Translators don’t waste time deciding terminology
- ✅ Lower costs - Fewer revisions needed for terminology corrections
- ✅ Brand protection - Company names, product names, slogans never mistranslated
What to Include in Your Glossary
1. Product and service names
- Product names (often not translated, e.g., “iPhone” stays “iPhone”)
- Feature names (e.g., “Translation Memory” → specific translation)
- Service tier names (e.g., “Professional Translation” vs. “AI Translation”)
2. Technical terminology
- Industry-specific jargon (legal, medical, engineering terms)
- Software UI elements (buttons, menus, error messages)
- Acronyms and abbreviations (with explanations)
3. Brand and marketing terms
- Company name and subsidiaries (translation or keep original?)
- Taglines and slogans (approved translations only)
- Marketing buzzwords (maintain brand voice)
4. Competitors and partners
- Competitor names (spell correctly in target language)
- Partner company names
- Third-party product names
5. Do-not-translate terms
- Trademarked names
- Legal entity names
- URLs and email addresses
- Branded hashtags
How to Create a Glossary in Taia
Step 1: Prepare your glossary
Create a simple spreadsheet with three columns:
- Column 1: Source term (English)
- Column 2: Target translation (e.g., Spanish)
- Column 3: Notes/context (optional but helpful)
Example:
| English | Spanish | Notes |
|---|---|---|
| Translation Memory | Memoria de traducción | Don’t translate as “memoria traductora” |
| Cloud Storage | Almacenamiento en la nube | |
| Taia | Taia | Brand name, do not translate |
| Upload | Cargar | Use “cargar” not “subir” for consistency |
Step 2: Upload to Taia
- Log in to your Taia account
- Navigate to Glossary section in dashboard
- Click “Upload Glossary” or “Create New Glossary”
- Upload your spreadsheet (supports .xlsx, .csv, .txt, .tbx formats)
- Assign glossary to specific language pairs (English → Spanish, English → French, etc.)
Step 3: Apply to projects
- When creating a new project, select your glossary from dropdown
- Taia automatically applies glossary terms during translation
- Translators see glossary terms highlighted in the editor
- 100% consistency guaranteed across all content
Pro tip: Start with 20-50 key terms, expand over time as you identify recurring terminology issues.
Learn more about glossary management
3. Import Translation Memory: Work Smarter, Not Harder
What is Translation Memory?
Translation Memory (TM) is a database of all your previous translations, stored segment-by-segment (sentence or paragraph level). When you translate new content, Taia automatically searches your TM for matches:
- 100% matches (exact sentence previously translated) → Free or 10-20% of full rate
- 75-99% fuzzy matches (similar sentence with minor edits) → 30-60% discount
- New segments (no match) → Full translation rate, then added to TM for future reuse
Result: Repeated phrases or sentences aren’t translated (and billed) again. It’s all about working smarter, not harder.
Real-World Savings Examples
Example 1: Product documentation updates
- Version 1.0: 50,000 words → Cost: $2,500 → Builds TM
- Version 1.1: 55,000 words (5,000 new, 50,000 unchanged) → Cost: $500 (only new words) → Savings: $2,000 (80%)
Example 2: Monthly marketing emails
- Month 1: 800 words → Cost: $144 → Builds TM
- Month 6: 800 words (recurring CTAs, intros, standard phrases) → Cost: $28 → Savings: $116 (81%)
Example 3: E-commerce product descriptions
- Initial catalog: 1,000 products, 10,000 words → Cost: $1,200
- New products (monthly): 50 products, 500 words (similar descriptions) → Cost: $50 (90% TM leverage) → Savings: $100/month
How to Import Existing Translation Memory
Already have translations from other tools? Import them into Taia to leverage from day one:
Step 1: Export from previous tool
- Most CAT tools (SDL Trados, MemoQ, Smartcat, etc.) support TMX export (Translation Memory eXchange format)
- Export your TM as .tmx file
- Alternatively, prepare bilingual spreadsheet (source column, target column)
Step 2: Import to Taia
- Log in to Taia account
- Navigate to Translation Memory section
- Click “Import TM”
- Upload .tmx file or bilingual spreadsheet
- Select language pairs (English → Spanish, English → German, etc.)
- Taia processes and indexes your TM (usually takes minutes)
Step 3: Use in projects
- Create new project, Taia automatically applies your imported TM
- Instant savings on first project (no need to build TM from scratch)
- Every new translation adds to TM (continuous growth)
Pro tip: Even importing 5,000-10,000 segments gives immediate 20-40% cost savings on your first Taia project.
Learn more about Translation Memory
4. Define Requirements for Translators: Context is King
Why Translator Instructions Matter
Providing clear guidelines for translators dramatically improves translation quality. Even the best linguists can’t read your mind—they need context about:
- Target audience (B2B executives vs. casual consumers)
- Tone and style (formal vs. conversational, technical vs. accessible)
- Special requirements (gender-neutral language, specific terminology preferences)
- Reference materials (brand guidelines, style guides, previous translations)
Without instructions: Translators make assumptions (may not align with your brand or intent).
With instructions: Translators deliver exactly what you need (fewer revisions, faster turnaround).
What to Include in Translator Instructions
1. Target audience and context
- Who will read this? (e.g., “SaaS developers,” “healthcare professionals,” “Gen Z consumers”)
- Where will it be published? (e.g., “website homepage,” “user manual,” “social media ads”)
- What’s the goal? (e.g., “drive conversions,” “educate users,” “build brand awareness”)
2. Tone and style
- Formality level (formal/professional, neutral, casual/friendly)
- Brand voice (authoritative, playful, empathetic, innovative)
- Writing style (concise, detailed, storytelling)
3. Specific terminology preferences
- Beyond glossary: General terminology guidance (e.g., “Prefer British English spelling,” “Use gender-neutral language”)
- Industry conventions (e.g., “Follow APA style for citations,” “Use SI units, not imperial”)
4. Do’s and Don’ts
- Do: Adapt idioms culturally (don’t translate literally)
- Don’t: Translate trademarked names
- Do: Maintain formatting (bold, italics, bullet points)
- Don’t: Add or remove content (translate only, don’t editorialize)
5. Reference materials
- Brand guidelines (PDF or link)
- Style guide (if available)
- Previous translations (examples of desired tone and style)
- Screenshots (for software localization, show context)
How to Provide Instructions in Taia
When creating a project:
- Subject matter field - Select category (Legal, Technical, Marketing, Medical, etc.) → Helps Taia assign specialized translators
- Special instructions field - Free-text box for detailed requirements
- Attach reference files - Upload brand guidelines, style guides, reference screenshots
Example instruction:
“This is a marketing landing page for a B2B SaaS product targeting enterprise IT managers. Tone should be professional but approachable (avoid overly technical jargon). Emphasize benefits over features. Follow our brand voice: innovative, trustworthy, customer-centric. See attached brand guidelines for specific terminology preferences. Target: drive demo bookings.”
Pro tip: Good instructions upfront = fewer revision rounds = faster delivery and lower costs.
5. Master the Dashboard: Your Project Management Control Center
Dashboard Overview
Taia’s intuitive dashboard is your project management hub, providing:
- Project status tracking - See all projects at a glance (in progress, completed, pending)
- File management - Upload, download, organize all translation files
- Translation Memory analytics - Track savings and TM growth over time
- Glossary management - Create, edit, apply glossaries across projects
- Team collaboration - Manage team members, assign roles, share resources
- Billing and invoicing - View costs, payment history, download invoices
Key Dashboard Features
1. Project overview
- Active projects - See status, progress percentage, deadline
- Completed projects - Access past translations, re-download files
- Pending approval - Review quotes before approving projects
2. Translation Memory dashboard
- TM size - Total segments stored (grows with every project)
- Savings calculator - See cumulative savings from TM leverage
- Leverage statistics - Percentage of TM matches per project (100%, fuzzy, new)
3. Glossary manager
- View all glossaries - Organized by language pair
- Edit terms - Add, update, delete glossary entries
- Apply to projects - Assign glossaries when creating projects
4. Team management
- Invite team members - Add colleagues to company account
- Assign roles - Company Manager, Team Manager, Full Member, Viewer
- Track activity - See who created/downloaded projects
5. Billing and reports
- Payment methods - Manage credit cards, invoice billing
- Invoice history - Download past invoices for accounting
- Cost reports - Track spending by project, language, month
Dashboard Best Practices
Organize projects with naming conventions
Use clear, descriptive project names:
- ✅ “Website Homepage - EN to ES - Q4 2025”
- ✅ “User Manual v2.1 - EN to DE/FR/IT”
- ❌ “Project 1” (too vague)
Set up email notifications
- Enable notifications for project milestones (quote ready, translation complete, file delivered)
- Customize alert preferences (email, in-app, both)
Regularly review Translation Memory
- Monthly: Check TM growth (how many new segments added?)
- Quarterly: Analyze TM leverage (what percentage of projects use TM?)
- Annually: Export TM backup (safeguard your translation assets)
Use filters and search
- Filter projects by status, language, date range
- Search for specific projects by name or content type
- Export project lists for reporting
Pro tip: Bookmark your dashboard—it’s your command center for all translation activity.
Explore Taia’s Translation Management System
Ready to Unlock Taia’s Full Potential?
By following these five best practices, you’re setting yourself up for translation success:
✅ Editable file formats → Flawless formatting preservation
✅ Glossaries → Perfect terminology consistency
✅ Translation Memory → 30-60% cost savings over time
✅ Clear translator instructions → Higher quality, fewer revisions
✅ Dashboard mastery → Efficient project management
Start optimizing your translation workflow today:
- Sign up for free (2,000-word trial, no credit card)
- Book a demo with our team for personalized platform walkthrough
- Contact us with questions about your specific translation needs
Frequently Asked Questions
What file formats should I avoid when uploading to Taia for translation?
Avoid PDFs and images whenever possible—here’s why and what to use instead: Problematic file formats: 1. PDFs (especially scanned or image-based) Why avoid: Text extraction unreliable (may be images, not editable text), formatting often breaks during translation (layout, fonts, spacing destroyed), Translation Memory segmentation poor (sentences don’t align correctly), requires manual cleanup (increases cost and time). When PDF is acceptable: Text-based PDFs with simple formatting (no complex tables, multi-column layouts), temporary solution if source file unavailable (contact support for preprocessing). Better alternative: Upload original source file (Word, InDesign, PowerPoint—whatever created the PDF). 2. Scanned images (JPG, PNG of documents) Why avoid: No text to translate (images contain pixels, not editable text), requires OCR (Optical Character Recognition) preprocessing (error-prone, expensive), formatting reconstruction needed (manual, time-consuming). Better alternative: If you only have scanned image, use OCR tool first (Adobe Acrobat, online OCR services), convert to editable Word document, then upload to Taia, OR contact Taia support for OCR assistance (available for enterprise customers). 3. Locked or password-protected files Why avoid: Platform can’t access content for translation, must be unlocked before upload. Solution: Remove password protection before uploading, OR provide password in project instructions. 4. Proprietary or unsupported formats Why avoid: Taia supports 65+ formats, but some rare proprietary formats unsupported (legacy CAT tool formats, custom database exports, ancient software versions). Solution: Convert to standard format (Word, Excel, HTML, XML), OR contact support to check if format can be supported. Recommended file formats: For documents: ✅ Word (.docx, .doc) - Best for text documents, formatting preserved perfectly, ✅ Excel (.xlsx, .xls) - Ideal for data tables, product catalogs, spreadsheets, ✅ PowerPoint (.pptx, .ppt) - Presentations with full layout preservation. For design/publishing: ✅ InDesign (.idml) - Professional publishing layouts (brochures, catalogs, magazines), ✅ FrameMaker (.mif) - Technical documentation, ✅ QuarkXPress (.xtg) - Print layouts. For web/software: ✅ HTML - Web pages with tags preserved, ✅ XML - Structured content, software strings, ✅ JSON - App localization files, ✅ .properties, .resx, .po, .strings, .yml - Software localization formats. For subtitles: ✅ SRT, VTT, SUB, SBV - Video subtitle files with timecode preservation. Best practices: Rule #1: Use editable source format Never convert to PDF for translation (defeats purpose of editable files), upload original file from authoring tool (Word, InDesign, HTML). Rule #2: Test before large volume Upload 1-2 pages as test project, verify formatting preserved correctly, if issues arise, try different export format or contact support. Rule #3: Keep it simple when possible Complex formatting = higher risk of issues (heavily formatted Word docs, multi-layer InDesign files), simplify formatting before translation if possible (reduces cost and turnaround time). What if you only have PDF? Option 1: Go back to source Find original editable file (check with designer, marketing team, IT), if original file lost, recreate in Word/InDesign (one-time effort, benefits all future translations). Option 2: PDF to Word conversion Use Adobe Acrobat “Export PDF” feature (converts to editable Word), review and clean up formatting issues, upload Word file to Taia. Option 3: Contact Taia support Enterprise customers: We offer PDF preprocessing (OCR, conversion, cleanup), small fee for conversion service, ensures optimal translation workflow. Bottom line: Always choose editable source files over PDFs or images. Your translation will be faster, cheaper, and higher quality. With Taia’s support for 65+ file formats, you can translate virtually any content type—just avoid PDFs when possible! Start translating with optimized file formats today!
How do I build an effective glossary for my translation projects?
Building a glossary is one of the smartest investments for consistent, high-quality translations: Step-by-step glossary creation: Step 1: Identify key terminology (30 minutes) Start with these categories: Product/service names - Your product names (e.g., “Taia AI Translator”, “Translation Memory”), feature names (e.g., “Glossary”, “Dashboard”, “Project Manager”), service tiers (e.g., “Professional Translation”, “Basic Translation”, “TEP”). Brand terms - Company name and spelling (e.g., “Taia” not “TAIA” or “taia”), taglines and slogans (approved translations only), marketing buzzwords specific to your brand (e.g., “enterprise-grade”, “AI-powered”). Technical terminology - Industry jargon (legal: “plaintiff”, “defendant”; medical: “diagnosis”, “prognosis”), software UI elements (buttons: “Submit”, “Cancel”; menus: “File”, “Edit”), acronyms and abbreviations (with full form: “TM = Translation Memory”). Do-not-translate terms - Trademarked names (yours and partners’), competitor names (spell correctly), URLs and email addresses, proper nouns (people, places). Common phrases - Standard CTAs (“Get Started”, “Book a Demo”, “Contact Us”), recurring descriptions (product descriptions, feature explanations), legal disclaimers and T&Cs boilerplate. How to identify: Review 3-5 recent documents you’ve translated (or will translate), highlight terms that should be consistent, ask team: “What terminology causes confusion or inconsistency?”. Step 2: Research correct translations (1-2 hours) Don’t guess—research: Competitor analysis - How do competitors in target market translate similar terms?, visit competitor websites in target language, note their terminology choices (adopt or differentiate). Native speaker consultation - Ask native speakers on your team (or hire freelancer for 1-hour consult), “How would you naturally say [term] in your language?”, verify which translation sounds professional vs. awkward. Industry standards - Check industry glossaries (legal, medical, technical fields have standard terminology), consult professional associations or regulatory bodies, ensure compliance with industry conventions. Translation Memory review - If you have past translations, review how terms were translated, identify inconsistencies (was “Cloud Storage” translated 3 different ways?), choose best translation as standard. Step 3: Create glossary spreadsheet (30 minutes) Simple 3-column format: Column 1: Source term (English or your source language), Column 2: Target translation (Spanish, German, French, etc.), Column 3: Notes/context (optional but highly valuable). Example glossary: | English | Spanish | Notes | |---------|---------|-------| | Translation Memory | Memoria de traducción | NOT “memoria traductora” (literal but wrong) | | Glossary | Glosario | Don’t use “vocabulario” | | Upload | Cargar | Use “cargar” consistently (not “subir”) | | Dashboard | Panel de control | NOT “tablero” (too literal) | | Taia | Taia | Brand name, never translate | | Cloud Storage | Almacenamiento en la nube | | | Get Started | Comenzar | CTA button text | Pro tips: Start with 20-50 core terms (don’t overwhelm), use consistent capitalization (decide: “translation memory” or “Translation Memory”), add pronunciation guide if needed (especially for brand names in non-Latin scripts). Step 4: Upload to Taia (5 minutes) In Taia platform: Log in → Navigate to “Glossary” section, click “Create New Glossary” or “Upload Glossary”, Option A: Upload spreadsheet (.xlsx, .csv, .txt formats supported), Option B: Manually enter terms in Taia’s glossary editor, assign to language pairs (English → Spanish, English → French, etc.), save and activate. Step 5: Apply to projects When creating new project, select glossary from dropdown menu, Taia automatically highlights glossary terms for translators, translators see approved translation + context notes, 100% consistency guaranteed. Step 6: Maintain and expand (ongoing) After each project: Review completed translation for new recurring terms, add to glossary (takes 2-5 minutes per project), update existing entries if better translation identified. Quarterly review: Analyze past projects for terminology inconsistencies, survey translators: “What terms need glossary entries?”, expand glossary to 100-200 terms over time. Glossary best practices: Make it bilingual - One glossary per language pair (English-Spanish glossary, English-German glossary), don’t create multilingual glossary (too confusing). Add context - Notes column explains WHY a translation is preferred, helps translators understand nuance, examples: “Use in technical docs only” or “Preferred by marketing team”. Differentiate by context - Same English term may have different translations in different contexts, example: “File” → “Archivo” (noun, computer file) vs. “Presentar” (verb, legal filing), add context notes to clarify. Include variations - Add plural forms if they differ (some languages have irregular plurals), include gendered forms if applicable (Romance languages). Don’t over-translate - Some terms better left in English (especially tech: “Cloud”, “AI”, “API” often kept in English globally), ask native speakers which terms to keep vs. translate. Version control - Date your glossary versions (“Marketing Glossary v2.3 - Nov 2025”), track changes over time (what was added, updated, removed), export backups regularly. Real-world impact: Before glossary: “Translation Memory” translated 5 different ways across projects (inconsistent, confusing for users), 3-4 revision rounds to fix terminology (costs $200-400 extra per project). After glossary: “Translation Memory” translated identically every time (perfect consistency), zero revision rounds for terminology (saves $200-400 per project), translators work faster (no time wasted deciding terminology). ROI: Glossary creation: 2-4 hours upfront, savings per project: $200-400 (fewer revisions), payback after: 1-2 projects, ongoing value: Perfect consistency forever. With Taia’s glossary management, you build a strategic terminology asset that improves quality and reduces costs on every future project. Start building your glossary today!
Can I import Translation Memory from other CAT tools into Taia?
Yes—Taia supports Translation Memory import from virtually all major CAT tools: Supported import formats: 1. TMX (Translation Memory eXchange) Industry standard format supported by all CAT tools (SDL Trados, MemoQ, Smartcat, Wordfast, Memsource, XTM, Phrase, etc.), How to export from your current tool: SDL Trados: File → Export → Translation Memory (.tmx), MemoQ: Translation Memory → Export → TMX format, Smartcat: Resources → Translation Memories → Export as TMX, Wordfast: Memory → Export → TMX, Phrase/Memsource: Translation Memory → Export → TMX. Upload to Taia: Dashboard → Translation Memory → Import TM → Upload .tmx file, select language pairs (EN-ES, EN-DE, etc.), Taia indexes TM (takes minutes to hours depending on size). 2. Bilingual spreadsheet (Excel, CSV) If your CAT tool doesn’t export TMX (or you have translations in spreadsheet), create simple 2-column format: Column 1: Source segment (English), Column 2: Target segment (Spanish, German, French, etc.). Example: | English | Spanish | |---------|--------| | Welcome to our platform | Bienvenido a nuestra plataforma | | Upload your files here | Sube tus archivos aquí | | Translation complete | Traducción completa | Upload .xlsx or .csv to Taia → Platform converts to TM format automatically. 3. XLIFF files XLIFF (XML Localization Interchange File Format) widely used in software localization, Taia imports XLIFF and extracts translation pairs into Translation Memory. What happens when you import TM: Taia processes and indexes - Platform extracts source-target segment pairs (sentence or paragraph level), builds searchable index for fast matching, assigns to specified language pairs. Immediate leverage - Next project you create, Taia automatically searches imported TM, applies 100% matches (exact segments) and fuzzy matches (similar segments), instant cost savings (30-60% on first project if good TM leverage). Continuous growth - Imported TM merged with new translations from Taia projects, every new project adds segments to TM, one unified Translation Memory (past + present translations). Quality and deduplication: Taia automatically: Removes duplicate segments (if same source-target pair appears multiple times, stored once), validates segment pairs (flags if source and target seem mismatched), segments if needed (long paragraphs split into sentences for better matching). Best practices for TM import: Clean up before import Export TM from old tool, review for quality (remove obvious errors, outdated translations), deduplicate if possible (smaller TM = faster import). Segment by content type If you have separate TMs for different content (marketing, legal, technical), import as separate TMs in Taia, apply appropriate TM to each project type. Test with small TM first Import 1,000-5,000 segments as test, create project and verify TM applies correctly, if issues, contact Taia support before importing full TM. Import iteratively Start with highest-quality TM (most recent, best translations), expand over time as you verify quality. Real-world import examples: Example 1: Migrating from SDL Trados Customer had 250,000-segment TM built over 5 years, exported as .tmx file (50MB), uploaded to Taia → indexed in 30 minutes, first Taia project: 70% TM leverage (saved $1,400 on $2,000 project). Example 2: Importing spreadsheet translations Customer had 10,000 product descriptions in Excel (English + Spanish columns), uploaded .xlsx → Taia converted to TM, next project (new products): 60% TM leverage (descriptions similar, high reuse). Example 3: Consolidating multiple TMs Customer used 3 different CAT tools over years (Trados, MemoQ, Smartcat), exported TMX from each → uploaded all to Taia, result: unified 400,000-segment TM (no more tool fragmentation). Limitations and workarounds: Very large TMs (1M+ segments) May take hours to index (upload overnight), consider splitting into smaller TMs by language pair or content type, contact Taia enterprise support for bulk import assistance. Poor quality legacy TM If old TM has errors or outdated translations, Option 1: Import anyway, let new Taia projects gradually replace poor segments with better translations, Option 2: Clean up before import (hire reviewer to audit TM quality). TM from machine translation Some CAT tools store MT output in TM (not human-validated), Taia accepts but quality may vary, consider: Mark as “MT TM” (separate from human TM) or review before importing. Post-import optimization: Monitor TM leverage Dashboard shows TM match rates per project (100%, fuzzy, new), if low leverage (<30%), TM may not align well with current content, add new content to build relevant TM. Regularly export TM backup Taia allows TM export (.tmx format), download quarterly as backup, ensures you never lose translation assets (portable to any tool). Bottom line: Taia makes TM import seamless—bring your translation history from any CAT tool and start saving immediately. No need to rebuild from scratch. With Taia’s Translation Memory system, you preserve all past translation investments and compound savings over time. Import your TM and unlock instant cost savings today!
What information should I provide to translators to ensure high-quality results?
Context is everything—the more information you provide, the better your translation: Essential information to include: 1. Target audience and purpose Who will read this? Describe reader demographics: B2B executives (formal, professional tone), consumers (casual, accessible language), technical users (engineers, developers - jargon acceptable), general public (avoid jargon, explain concepts). Age, education level, familiarity with topic (beginners vs. experts). What’s the purpose? Persuade (marketing, sales copy - emotional, benefit-driven), inform (documentation, help articles - clear, precise), educate (tutorials, guides - step-by-step, supportive), entertain (social media, blog - engaging, conversational), comply (legal, regulatory - formal, accurate). Where will it appear? Website homepage (first impression, concise), user manual (detailed, instructional), social media post (short, punchy), email campaign (personalized, action-oriented), product packaging (concise, compliant), legal contract (formal, precise). Example instruction: “This is a landing page targeting enterprise CIOs and IT managers. Purpose: Drive demo bookings for our SaaS platform. Tone: Professional but approachable, emphasize ROI and security. Reader: Technical background but not developers—avoid deep technical jargon, focus on business benefits.” 2. Tone and style guidelines Formality level: Formal - Legal documents, academic papers, corporate reports (use: passive voice, complex sentences, technical terms), Neutral - Product documentation, news articles, general business (use: active voice, clear structure, standard terminology), Casual - Marketing content, social media, lifestyle brands (use: conversational tone, contractions, relatable language). Brand voice: Authoritative (expert, confident, trustworthy), innovative (forward-thinking, cutting-edge, visionary), empathetic (caring, understanding, supportive), playful (fun, quirky, humorous), professional (serious, competent, reliable). Writing style: Concise (short sentences, bullet points, get to the point), detailed (thorough explanations, context, examples), storytelling (narrative arc, emotional connection), data-driven (statistics, facts, evidence-based). Example instruction: “Brand voice: Innovative and empowering. We want customers to feel confident and excited about using our product. Tone: Conversational but professional (think: smart friend, not stuffy corporation). Style: Use short paragraphs, active voice, and plenty of subheadings. Avoid: Corporate jargon, buzzwords without substance.” 3. Cultural and localization preferences Adaptation vs. translation: Should idioms be adapted culturally? (e.g., “it’s raining cats and dogs” → local weather idiom), or translated literally? (if culturally neutral), Should humor be localized? (jokes, wordplay may not translate - adapt or remove?). Regional preferences: Which regional variant? (Latin American Spanish vs. Spain Spanish, Brazilian Portuguese vs. European Portuguese, US English vs. UK English), local units of measurement (metric vs. imperial, currency symbols). Cultural sensitivities: Topics to avoid or handle carefully (politics, religion, cultural taboos), imagery or colors with cultural meaning (red = luck in China, mourning in South Africa), inclusive language (gender-neutral, LGBTQ+ inclusive, disability-aware). Example instruction: “Target: Latin American Spanish (Mexico, Colombia, Argentina). Use neutral Latin American Spanish—avoid regionalisms from specific countries. Adapt idioms culturally (don’t translate literally). Use metric units. Be inclusive: gender-neutral language where possible.” 4. Specific terminology and style rules Beyond glossary: Preferred terminology patterns (e.g., “use ‘customer’ not ‘client’”, “prefer active voice”), capitalization rules (title case for headings?, product names always capitalized?), numbers and dates (spell out or use digits?, date format: MM/DD/YYYY or DD/MM/YYYY?). Formatting preferences: Preserve bold, italics, bullet points exactly, maintain heading hierarchy (H1, H2, H3), keep hyperlinks intact (URLs not translated unless specified). Technical requirements: Character limits (e.g., UI buttons max 20 characters), line breaks (preserve or translator can adjust?), variables and placeholders (e.g., {user_name}, %s - do NOT translate). Example instruction: “Follow AP Style for numbers (spell out one through nine, use numerals for 10+). Dates: Month DD, YYYY (e.g., ‘November 7, 2025’). Product names always capitalized: ‘Translation Memory’, ‘Glossary’. Preserve all HTML tags and variables (e.g., {{variable}} must not be translated).” 5. Reference materials Attach helpful files: Brand guidelines (PDF or link) - Tone of voice, visual identity, approved messaging, terminology preferences. Style guide (if you have one) - Grammar rules, formatting standards, writing conventions. Previous translations (examples of quality you expect) - “Translate with similar tone and style as these samples”, helps translator understand your preferences. Screenshots or mockups (for software/website localization) - Visual context (where will text appear?), helps translator make formatting decisions (short vs. long text). Competitor examples - “We like how Competitor X translates [term]—use similar approach”. Glossary and Translation Memory - Upload glossary (mandatory terminology), imported TM (leverage previous translations). Example attachment list: ✅ Brand Voice Guidelines (PDF), ✅ Product Screenshots (JPG), ✅ Previous website translation (Word doc - example of desired tone), ✅ Glossary (Excel - 50 key terms). How to provide instructions in Taia: During project creation: Step 1: Select subject matter dropdown (Legal, Technical, Marketing, Medical, etc.) - Helps Taia assign specialized translators with relevant expertise. Step 2: Special instructions field free-text box - Paste detailed instructions (audience, tone, style, preferences), be specific but concise (1-3 paragraphs ideal). Step 3: Attach files Upload reference materials (brand guidelines, screenshots, examples), files visible to assigned translator. Example full instruction: > Project: Marketing landing page for enterprise SaaS product > Audience: B2B IT managers and CIOs (technical background, budget decision-makers) > Purpose: Drive demo bookings (persuasive, benefit-focused) > Tone: Professional but approachable (not stuffy, not overly casual) > Style: Active voice, short paragraphs, subheadings every 2-3 paragraphs > Target: US English (American spelling, date format) > Adapt: Culturally adapt idioms and humor (don’t translate literally) > Preserve: All HTML tags, hyperlinks, bold/italic formatting > Attach: See brand guidelines (PDF) and previous landing page translation (Word) for tone reference > Glossary: Applied (see 40 key terms) What happens with your instructions: Taia’s Project Manager reviews instructions, assigns specialized translator (matches expertise to your requirements), translator sees instructions in editor interface, PM conducts final review (validates instructions followed). Instructions = fewer revisions: Without instructions: Translator guesses tone, audience, preferences → 2-3 revision rounds ($200-400 extra cost + 3-5 days delay). With instructions: Translator delivers exactly what you need → 0-1 revision rounds (minor tweaks only) → saves time and money. Bottom line: Spend 10-15 minutes writing clear instructions → save hours of revisions and hundreds of dollars in rework. With Taia’s Translation Management System, you provide context once and get perfect results every time. Start your project with comprehensive instructions today!
How does Taia’s dashboard help me manage multiple translation projects?
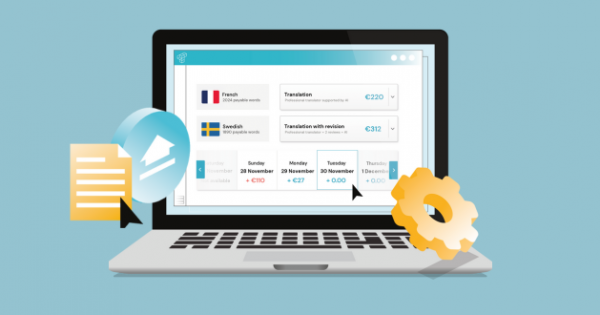
Taia’s dashboard is your translation command center—manage everything from one intuitive interface: Key dashboard features: 1. Project overview and tracking See all projects at a glance: Active projects - Currently in progress (status: “Translating”, “In Review”, “Pending Approval”), progress bar (% complete), estimated delivery date, assigned team members. Pending quotes - Projects awaiting your approval (word count, cost, TM savings shown), one-click approve or modify. Completed projects - Archive of all past translations, re-download files anytime, duplicate projects with one click (reuse settings for similar content). Filters and search: Filter by: status (active, completed, pending), language pair (EN-ES, EN-FR, etc.), date range (last 7 days, last month, custom), project type (marketing, legal, technical). Search by project name or content keywords. Example use case: Marketing manager has 15 active projects (5 blog posts, 3 landing pages, 7 social media campaigns), filters dashboard to show only “Landing Pages” + “Active”, sees 3 projects: 2 in review (ready tomorrow), 1 awaiting approval (click to approve quote), total control with zero clutter. 2. File management Upload and organize: Drag-and-drop file upload (or click to browse), supports 65+ formats (Word, Excel, PowerPoint, HTML, JSON, InDesign, etc.), batch upload (select multiple files, create separate projects or combine into one). Download translated files: Download individual files (click “Download” button per project), batch download (select multiple completed projects, download as .zip), version control (access previous versions if file updated). File organization: Rename projects for clarity (e.g., “Website Homepage v2 - Nov 2025”), tag projects with labels (e.g., “Q4 Campaign”, “Product Launch”, “Ongoing”), create folders (organize by client, department, content type). Example use case: Agency managing 10 clients, creates folder per client (“Client A”, “Client B”, etc.), tags projects by campaign (“Black Friday”, “Holiday Season”), instant organization (find any project in seconds). 3. Translation Memory analytics Track TM growth and savings: TM dashboard shows: Total segments stored (grows with every project), TM size per language pair (EN-ES: 50,000 segments, EN-FR: 30,000 segments, etc.), savings calculator: Cumulative savings (total $ saved from TM leverage since account creation), per-project savings (shows TM impact on each project quote). Leverage statistics: Per-project breakdown: 100% matches (exact reuse), fuzzy matches (75-99% similarity), new content (added to TM). Example visualization: Project quote: $1,000 before TM, After TM: 40% of content matched (400 words free), fuzzy matches discounted 50% (200 words at $0.06 instead of $0.12), final cost: $688 → savings: $312 (31%). Export and backup: Download TM as .tmx file (industry-standard format), portable to other CAT tools if needed, backup quarterly (safeguard translation assets). Example use case: Operations manager wants to show ROI of Taia investment, opens TM dashboard → sees $47,000 saved over 12 months from TM leverage, exports report for CFO → instant justification for translation budget. 4. Glossary management Create and maintain glossaries: Glossary dashboard: View all glossaries (organized by language pair), edit terms (add, update, delete entries inline), upload bulk glossaries (.xlsx, .csv, .txt formats), download glossaries (export for backup or sharing). Apply to projects: When creating project, select glossary from dropdown, Taia highlights glossary terms for translator, 100% terminology consistency guaranteed. Glossary usage tracking: See which projects used which glossaries, identify missing terms (translator flagged unfamiliar term → add to glossary). Example use case: Global brand has 3 glossaries: Brand Terms Glossary (product names, taglines - 50 terms), Technical Glossary (engineering docs - 200 terms), Legal Glossary (contracts, T&Cs - 100 terms), applies correct glossary per project type → perfect terminology every time. 5. Team collaboration Manage team members and permissions: Add team members: Invite colleagues by email (they receive signup link), assign roles: Company Manager (full access to all projects, billing, team), Team Manager (manage specific team, create projects, assign members), Full Member (create own projects, can’t manage team), Viewer (read-only access, view project status and download files). Track team activity: See who created each project (attribution), who downloaded files (audit trail), project assignments (which team member handling what). Shared resources: All team members share Translation Memory (TM grows faster, everyone benefits), shared glossaries (consistent terminology across all team projects), centralized billing (company account billed once, not per user). Example use case: Localization team with 8 members (1 manager, 7 coordinators), Manager: Creates projects, assigns to coordinators, approves invoices, Coordinators: Upload files for their region, download translations, track progress, Shared TM: All 8 members leverage same Translation Memory → 30% cost savings from day one. 6. Billing and cost tracking Transparent pricing and invoicing: Payment dashboard: View current balance (prepaid credits if applicable), payment methods (credit cards, invoice billing), upcoming charges (projects pending approval show cost). Invoice history: Download past invoices (.PDF format), export for accounting (integrate with expense systems), filter by date, project, amount. Cost reports: Track spending by: Project type (marketing, legal, technical), language pair (which languages cost most?), month/quarter/year (budget tracking), team member (department chargebacks). Budget alerts: Set spending thresholds (e.g., alert at $5,000/month), email notifications when approaching limit, prevent surprise overages. Example use case: Finance manager sets $10,000 monthly budget, receives alert at $7,500 (75% of budget), reviews dashboard: $4,000 on marketing, $2,500 on product docs, $1,000 on legal, adjusts priorities for rest of month → stays on budget. Dashboard best practices: Name projects clearly Use descriptive names with dates (e.g., “Q4 Campaign Landing Page - EN to ES - Nov 2025”), makes searching and filtering effortless. Set up email notifications Enable alerts for: project milestones (quote ready, translation complete), TM savings (monthly TM leverage report), budget thresholds. Review dashboard weekly Monday morning: Check active projects (any delays? approvals needed?), download completed translations, plan upcoming week’s projects. Use tags and folders Organize by: campaign (e.g., “Black Friday”, “Q1 Launch”), client (for agencies), content type (e.g., “Website”, “Docs”, “Marketing”). Export data quarterly Download: TM backups (.tmx), glossaries (.xlsx), invoice reports (.CSV), safeguard data, analyze trends. Real-world efficiency: Before Taia: Projects tracked in email, spreadsheets, multiple CAT tools (chaos), no visibility into TM savings, billing scattered across vendors. With Taia: All projects in one dashboard (instant visibility), TM savings calculated automatically (ROI transparent), one invoice, one vendor, one platform → 80% less admin time. Bottom line: Taia’s dashboard transforms translation from chaos to clarity—manage dozens of projects, track every dollar saved, collaborate seamlessly with your team. With Taia’s Translation Management System, you gain complete control over your translation workflows. Explore the dashboard today!

Localization Experts
The Taia team consists of localization experts, project managers, and technology specialists dedicated to helping businesses communicate effectively across 189 languages.